Size of final pot compared to original sour cream mold. Just a little bit of shrinkage!
Planter by Jenny Rijke
Every week I try and show my students something new in pottery – an effort to inspire them and introduce them to new techniques. One such technique is using molds to make pottery. Inspired by the work of ceramicist, Jenny Rijke, I thought she would be a good model for my students.
Rijke uses cobalt to color her clay, and creates simple and beautiful pots. While I am not sure of her process, there is a standard method for making molds which I used to make my pots.
The first step is to find a suitable object from which to make a mold. It has to be a simple shape, with no ridges or indentations. One can make a mold from nearly any shape, but to keep it simple, and a one step mold, it needs to have walls of that are “flat”. I chose a sour cream container for the mold I made.
The outside of the cup is then coated with Vaseline. The cup is sunk in a plaster of paris mixture prepared according to directions. Make sure you add weight to the cup before you sink it in the plaster mixture, otherwise it pops up. You want to find a container at least an inch and half wider than the mold on all sides – including the bottom. I used an oatmeal container as a vessel for the mold.
Once the plaster has dried, remove the container. It should slide out fairly easily because it is covered in Vaseline. You also want to remove the outside vessel, in this case the oatmeal container, so the mold can “breathe” properly and dry between uses. The mold, if properly taken care of, should last years.
The plaster mold and sour cream cup.
To prepare the clay, I use my blender. I take extra wet clay from my recycled clay bin, and whip it up with more water so it is the consistency of mayonnaise. It is best to let it sit a day so some of the air escapes, but I have used it straight from the blender. One needs to make enough slip, the wet clay mixture in the blender, to fill the entire cup.
I took about ¼ of the mixture and added a tiny bit of cobalt carbonate. You can use straight cobalt carbonate, like I did, or mason stains. Where I made my mistake, though, was I should have added food coloring to my mixture. It was really hard to tell which slip mixture had the cobalt and which slip was white.
I added the colored slip to the white slip and gave it a quick stir. As I am looking at Rijke’s photo, it looks like she adds the white slip to the bottom of her mold, and then spoons in the colored mixture on top, then adds more white slip, to about half way up, and then swirls it around in the mold. Once swirled around, she probably adds more slip to the very top of her mold. Once filled, it should sit until the walls of the pot look like they are about ¼ inch thick. Depending on how wet the mold is, and the moisture of the slip, that can take an hour to a day. Once the walls have reached the proper thickness, then the rest of the clay should be poured out. Set it aside in a covered container so it can be used again.
Little cup that I made
Once the slip has dried to the leather hard stage, it can easily be removed from the mold. I used the wheel to clean up the unevenness on the top edge.
I like the contrast in colors the Rijke gets. Next time I use my mold, I will add the colored slip later in the process. I think that will get better contrast. I love all the cool ideas one can find on the internet. As an artist, I should settle on one style and perfect that, but there is just so much out there to try! Much more fun to try new ideas!
One of the best aspects of my retirement, has been sharing my love of pottery with others. The last year, I have been offering pottery lessons as well as single night ceramic workshops at my home studio. With the new year, maybe you would like to add some relaxing creativity to your schedule, and here are a couple of ideas to do that.
Prescott Community Center Pieces
One of the workshops has been through the Prescott Community Center. This workshop is a 6 week project oriented class. Each week, students work on a new project. They have made mugs, bowls, plates, and butter dishes. All of which have been beautiful and unique. The great thing about pottery, in particular hand building, is you can make a professional looking piece, with no
experience. This spring, I will be offering two more workshops through Prescott. Once Prescott has the new catalog up, I will add a link.
High School freshman mug
On my website,I am offering an 8 week, 16 hours , pottery lessons. Currently, two of my students have both challenged me in very different ways. I have one young woman who is a freshman in high school. She is an artist, and combining that with her pottery, she has produced some really wonderful pieces. She has challenged me to be more artistic in my own glazing, and take more time in the final process. I love throwing, but glazing, which can be the make or break it of pottery making, has always been the worst part. I can make a beautiful pot, only to ruin it with my glazing.
Left Handed Bowl
My other challenger is a gentleman, who is left handed. I have been teaching pottery, off and on, since college, some 30 years now. I have never had a left handed person – or if I did, I didn’t know. Only recently have pottery wheels been able to go both directions – clock wise and counter clock wise. You could buy Shimpos way back then, which went both directions, but they were very expensive. As I am learning, people who are left handed are better suited to work on a wheel that turns clockwise, rather than counter clock wise – which most of us right handed folks use. I have to think twice when trying to help, and even with that,
Fairy House made at Workshop
some times I still don’t get it right!For me, throwing, at this point, is pretty much second nature. I don’t really think about what I am doing, I just do it. Despite the challenge, and my help, he has made some really gorgeous pots.
Another workshop which has been popular is “Make a Fairy House” or ” Make a Toad House“. If your neighborhood toads and fairies are homeless, this is the workshop for you!
Zentangle Platter
Another recent workshop was with Donna Spencer, a certified Zentangle teacher, a woman I met through the gallery I used to manage. She was one of the participating artists who made some of the most beautiful intricate pen and ink designs, called Zentangle. We ran a workshop combining zentangle and clay, and the attendees, limited to just 4 folks, made some gorgeous platters.
Donna and I are offering a new workshop in March, which will combine Zentangle and Sgraffito. Sgraffito is an ancient technique used to decorate pottery where a design is scratched into the clay. The workshop is limited to four folks. During the workshop you will make the platter, learn about Zentangle, and create your own beautiful design on the platter. Instead of applying the glaze, as in the previous workshop, you will scratch away the glaze to create the design.
Oak Leaves – Zentangle and Sgraffito
Lastly, I will be offering a workshop Sunday 2/24/19. The workshop will make a lotion or soap dispenser. For more information about that workshop, click here.New Workshop – Make a Lotion Dispenser
I hope to see you soon at one of my workshops, so I can share with you my love of clay. Not only is it a creative venue, but you will also find it is very relaxing and good for the soul.
The other day I found myself making some piggy banks, and it got me to thinking…who ever thought of the idea of a piggy bank? Thank goodness, for the internet, with answers to questions at our finger tips.
From The FinancialBrand.com
“The origin of piggy banks dates back nearly 600 years, in a time before real banks even existed. Before the creation of modern-style banking institutions, people commonly stored their money at home — not under the mattress (or hay rack), but in common kitchen jars. During The Middle Ages, metal was expensive and seldom used for household wares. Instead, dishes and pots were made of an economical orange-colored clay called pygg. Whenever folks could save an extra coin or two, they dropped it into one of their clay jars — a pygg pot.” (https://thefinancialbrand.com/24204/history-of-piggy-banks/)
The piggy banks I made, started with 24 ounces of clay. From the original size, clay shrinks a lot more than you would expect – about 20% from start to finish. The original bodies of the pigs were about 8 inches long – the final bodies were about 6 inches long! After they are slowly dried for a day or two, legs, ears and eyes are added, giving them each their individual character. A slot is added on their back for money to be deposited, and a hole cut in their belly for withdrawals.
Pigs before the bisque firing
After a week of further drying, they are put in the kiln and cooked to 1900 degrees fahrenheit. This is called a bisque fire, and prepares them for the final glaze firing. I wanted to glaze them in a pale pink glaze recipe I found on the internet, but being an impatient kind of person, rather than testing the glaze first, I decided to plunge ahead and cross my fingers that the glaze would be the right color. While it is not pink, not close to what I expected, the gray color works, so my gamble worked out ok. I think I need to add more chrome, so I will do some more testing before I use it again. To glaze the pig, he is dunked in a bucket of glaze, which is basically powdered glass, and then I paint a flower on his rump using underglazes. The final glaze firing cooks the pigs to 2200 or so degrees fahrenheit.
Piggy banks are just one of the many functional, practical things that can be made with clay. Not only is it fun to work with clay have you checked out all the different workshops I offer?) Click here to learn more. Hand made ceramic pottery also makes a great gift, either for yourself, or maybe someone you know.
Do you find money in your washing machine? Used to happen to me, because I rarely used to check pockets when I do laundry. Always assumed people would put their dirty clothes in the hamper after they emptied their pockets. I used to keep a jar in the laundry room, into which all things collected from the washer would go. I wish I had one of these cute little piggy banks to store on the bathroom counter instead.
Maybe you have a young child learning about money? This is a way to help them understand the value of saving. The corked hole on the belly of the pig allows easy withdrawal, with out the trauma of having to smash the pig to get at the contents.
Piggy banks are fun to make because they do not require trimming. While they are more labor intensive to make, it is fun to see a row of them, with their expressive faces smiling back.
I bought myself a new tool for Christmas. After a fairly successful year selling my pottery at local farmers’ markets, and off my website, and teaching, I decided to invest in my studio and bought myself a clay extruder. It is exactly like the ones we had with play dough – only made of metal. It can extrude square tubes, hexagonal tubes, round tubes, as well as all those shapes as solids.
Extruded tube with thrown neck, could be used as lotion or soap pump, with added detail.
When I bought it, I wasn’t sure how I was going to put it to use, but, now that I have it, I can’t seem to get out of the studio. So many new projects to explore, so many new creative ideas. For decades, I have described myself as a production potter. Nice functional pottery, but differing from other potters who may spend a day on each piece. I can fill a kiln after an afternoon of throwing at the wheel. With hand building, though, I find myself moving away from production, and focusing more on the individual piece – which actually is a good thing.
One of the tricks with this extruder, though, is keeping the tube straight. It has a tendency to want to twist. There is one artist on line I have seen, who makes the twist even more exaggerated – and it looks really cool.
Here are just a few things I have made over the last few days. They still need to be bisque fired, and then glazed and refired, but each of the more detailed pieces is taking a couple of hours to make, and it seems so much more satisfying. Can’t wait to see how they look when they come out of the kiln after being glazed!
I started working with clay in 5th grade. The summer camp I attended had the best studio space, where I spent most of my time. The ability to take a lump of nothing, and transform it into some thing functional and beautiful is without equal. Maybe you remember the fun of working with clay from your youth?
Because of my love of working with clay, I want to share what I know and experience on a regular basis with others so that they may also reap the benefits of playing with clay. Whether you have played with clay before or not, it is an opportunity not to be missed. It is an amazingly easy way to relax and have a huge sense of accomplishment – in a very little time!
For a detailed listing of what we will be making, click here. Chose an item and contact me to schedule a time. I am retired, so my schedule is wide open.
Here are some pictures of one class that I held recently. Their casseroles have not gone into the kiln, yet, they should be done by the weekend, and I will add those pictures. As novices, each and every one looks beautiful, and has the added benefit of being functional, too…dishwasher, oven, and food safe, as well as microwavable.
Do you have some friends who want to play in the clay, or would you like to stop by? Check out the schedule, or if that is not convenient, contact me directly. I am happy to schedule a time that works for both of us. Also, working with clay makes for a great parent/child activity or even date night!
Working with clay is one of the most satisfying forms of art that is out there. To take a lump of clay, without form , and turn it into a beautiful piece of art, that is also functional, is incredibly satisfying.
Hibiscus Serving Platter – July 16th
Mug or Cylinder – You Decide! July 23
Now you can participate in that activity! Every Monday evening, I will lead a group of 4 people, max, in different hand building projects. The projects will last about 2 hours each, and require absolutely no prior clay experience.
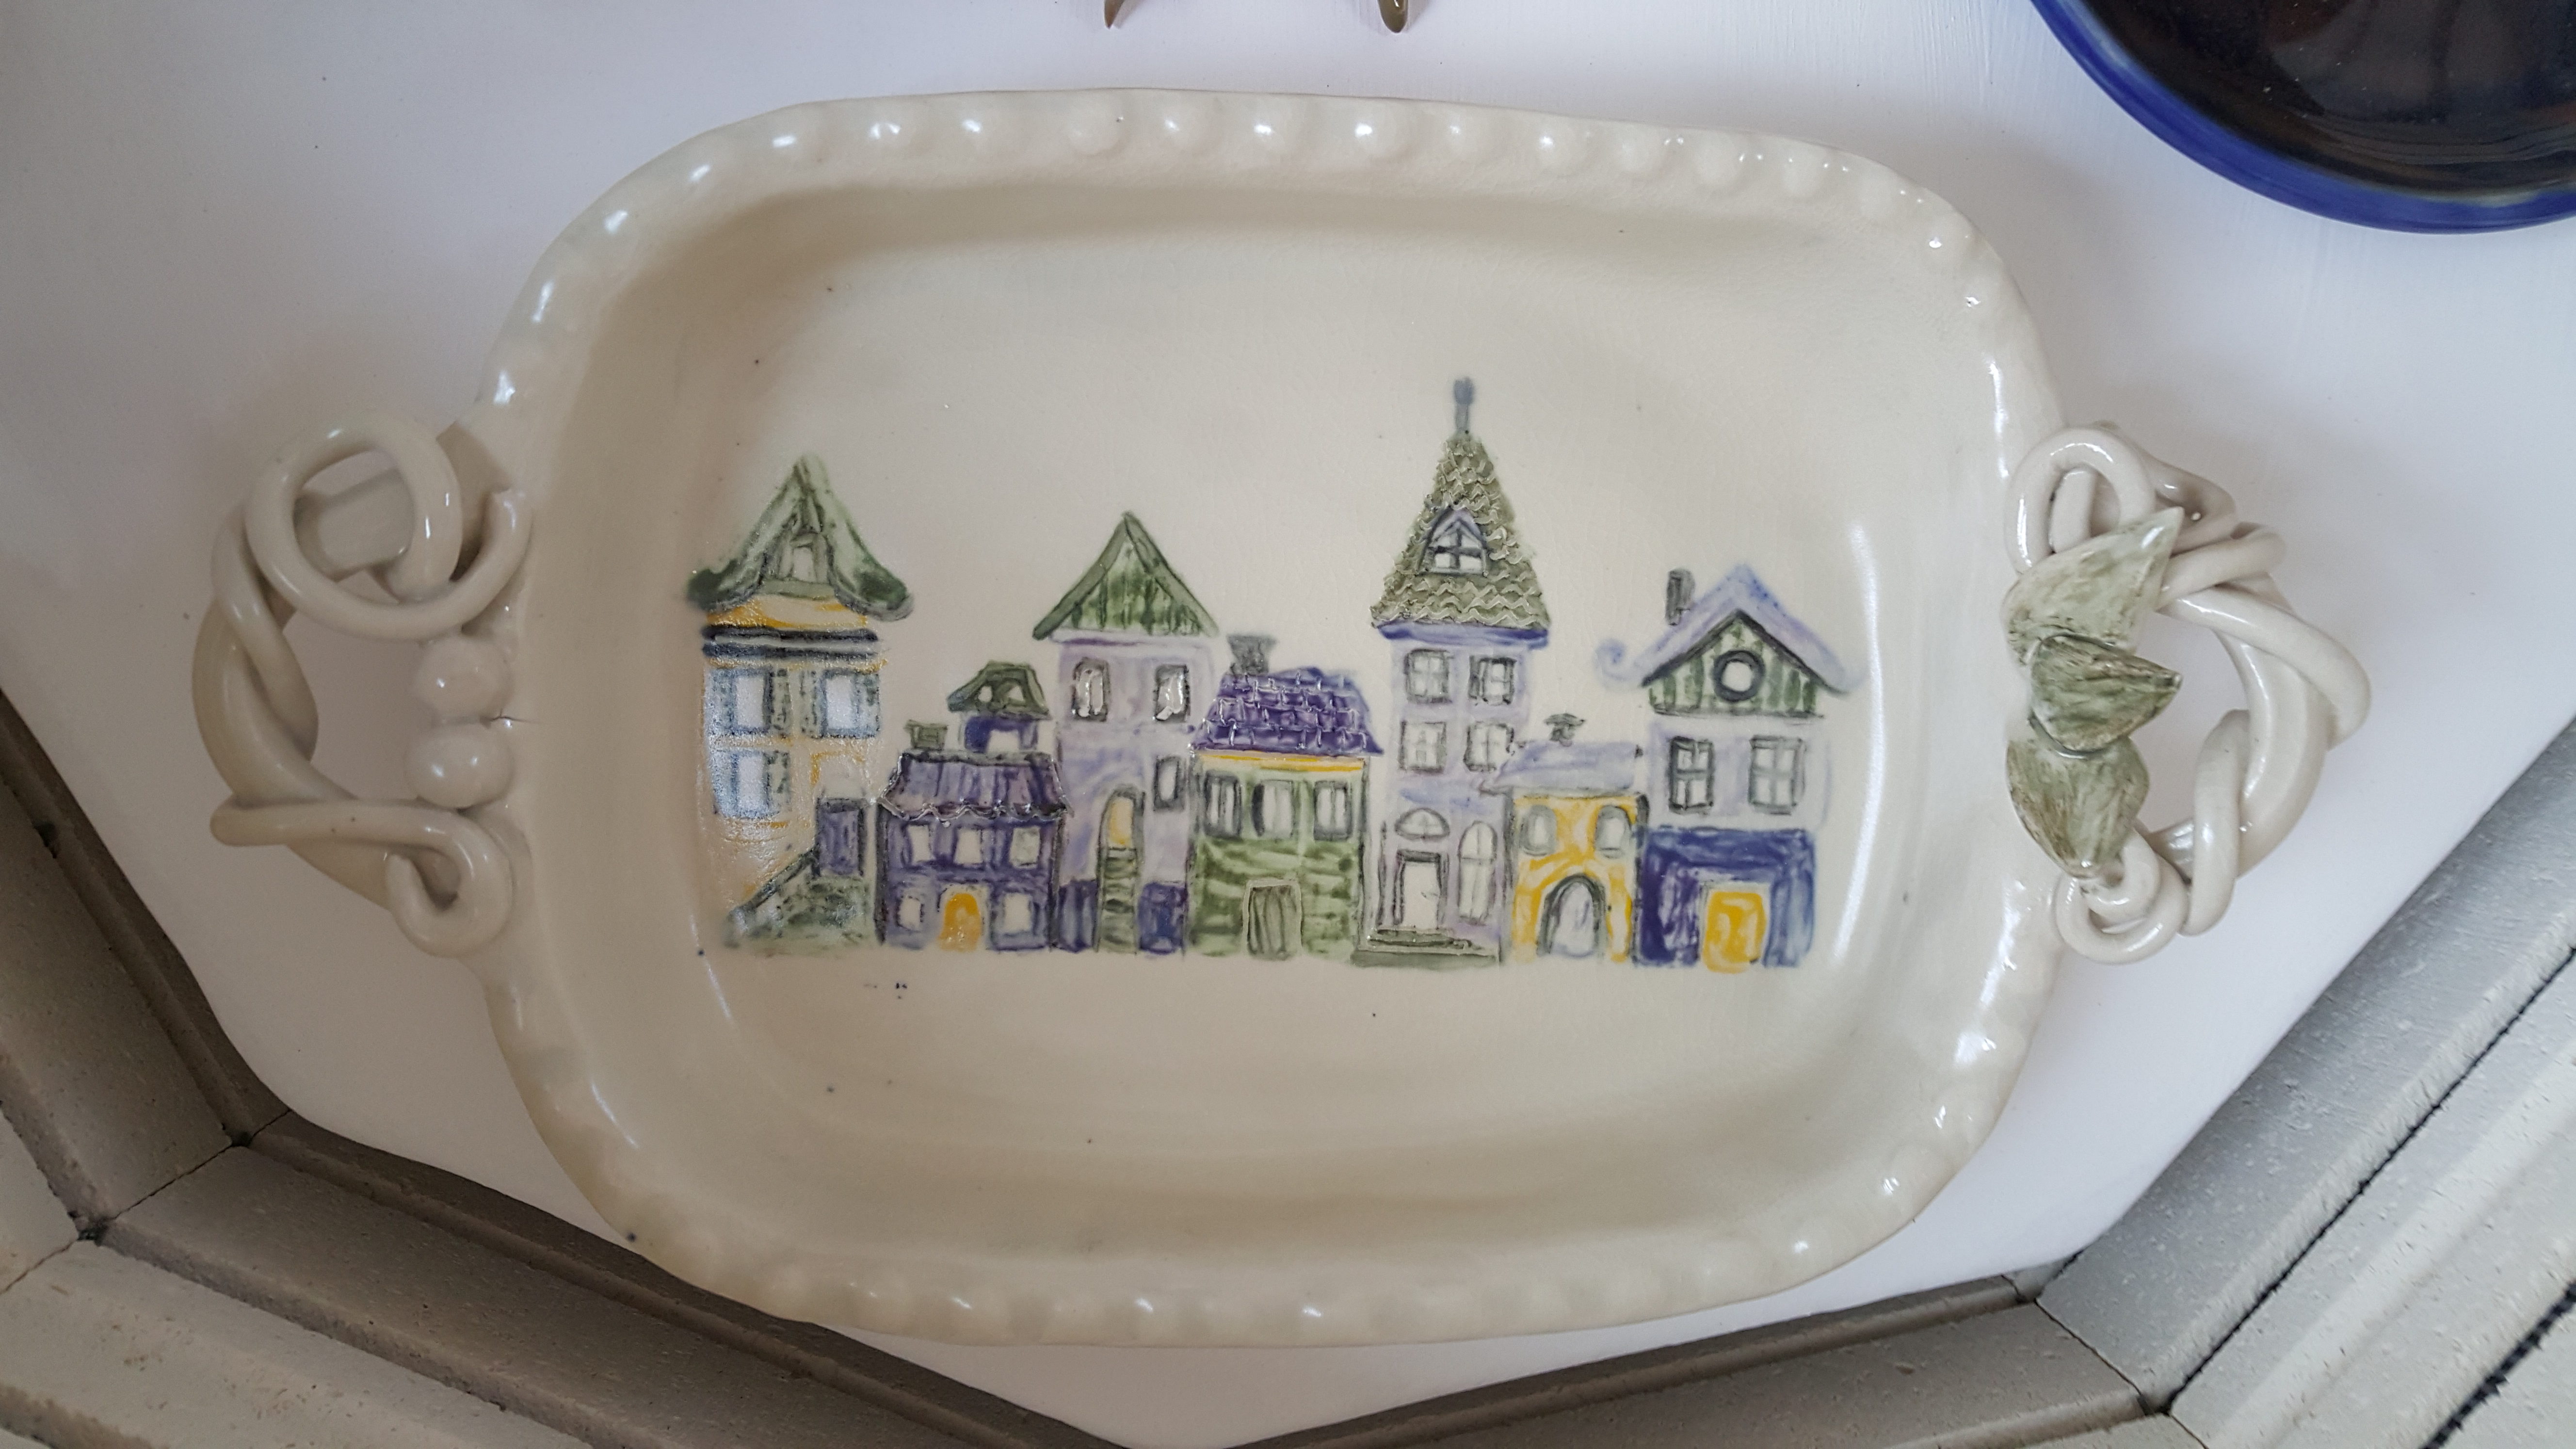
Tree Baking Dish – August 28
(If you can’t make Monday, I am happy to schedule a day/time that works for you)
Butter Dishes – August 13, 6:30 – 8:30
The cost of the workshop ranges from $30 to $50 depending on the size and complexity of the project, and includes all materials.
The following are tentative projects (Links will be added as I complete examples)
Projects will basically be finished in one night, and I will complete with final clear over glaze. Should you have time and desire, you are more than welcome to come back and do the final glazing of your piece when time permits, at no extra charge. It will generally take two weeks for a bisque fire, and then another week for a glaze fire. Firings in the kiln are dependent on having enough pieces for a full load. If any of these ideas are something you would like to do, but can not make Monday nights, please contact me to schedule another time that is more convenient.
As I complete an example of the projects noted, I will post the class on my website, so please stay in touch!
My studio has A/C or heat, or an open door to the woods beyond.
Part of being an artist is learning through experience. Not everything works as it should. These two pieces took hours to make, but in the end, had too many defects to ever sell, so they go into my increasing inventory of rejects.
The oak leaf chip and dip had numerous stress fractures from drying too quickly. I have made a few more, and am changing the way I made them. This time, I have made the leaves and chip and dip, and allowed them to dry together in a plastic bag so they reach the same moisture content. Hoping that when I attach the leaves, they will have a better chance of surviving.
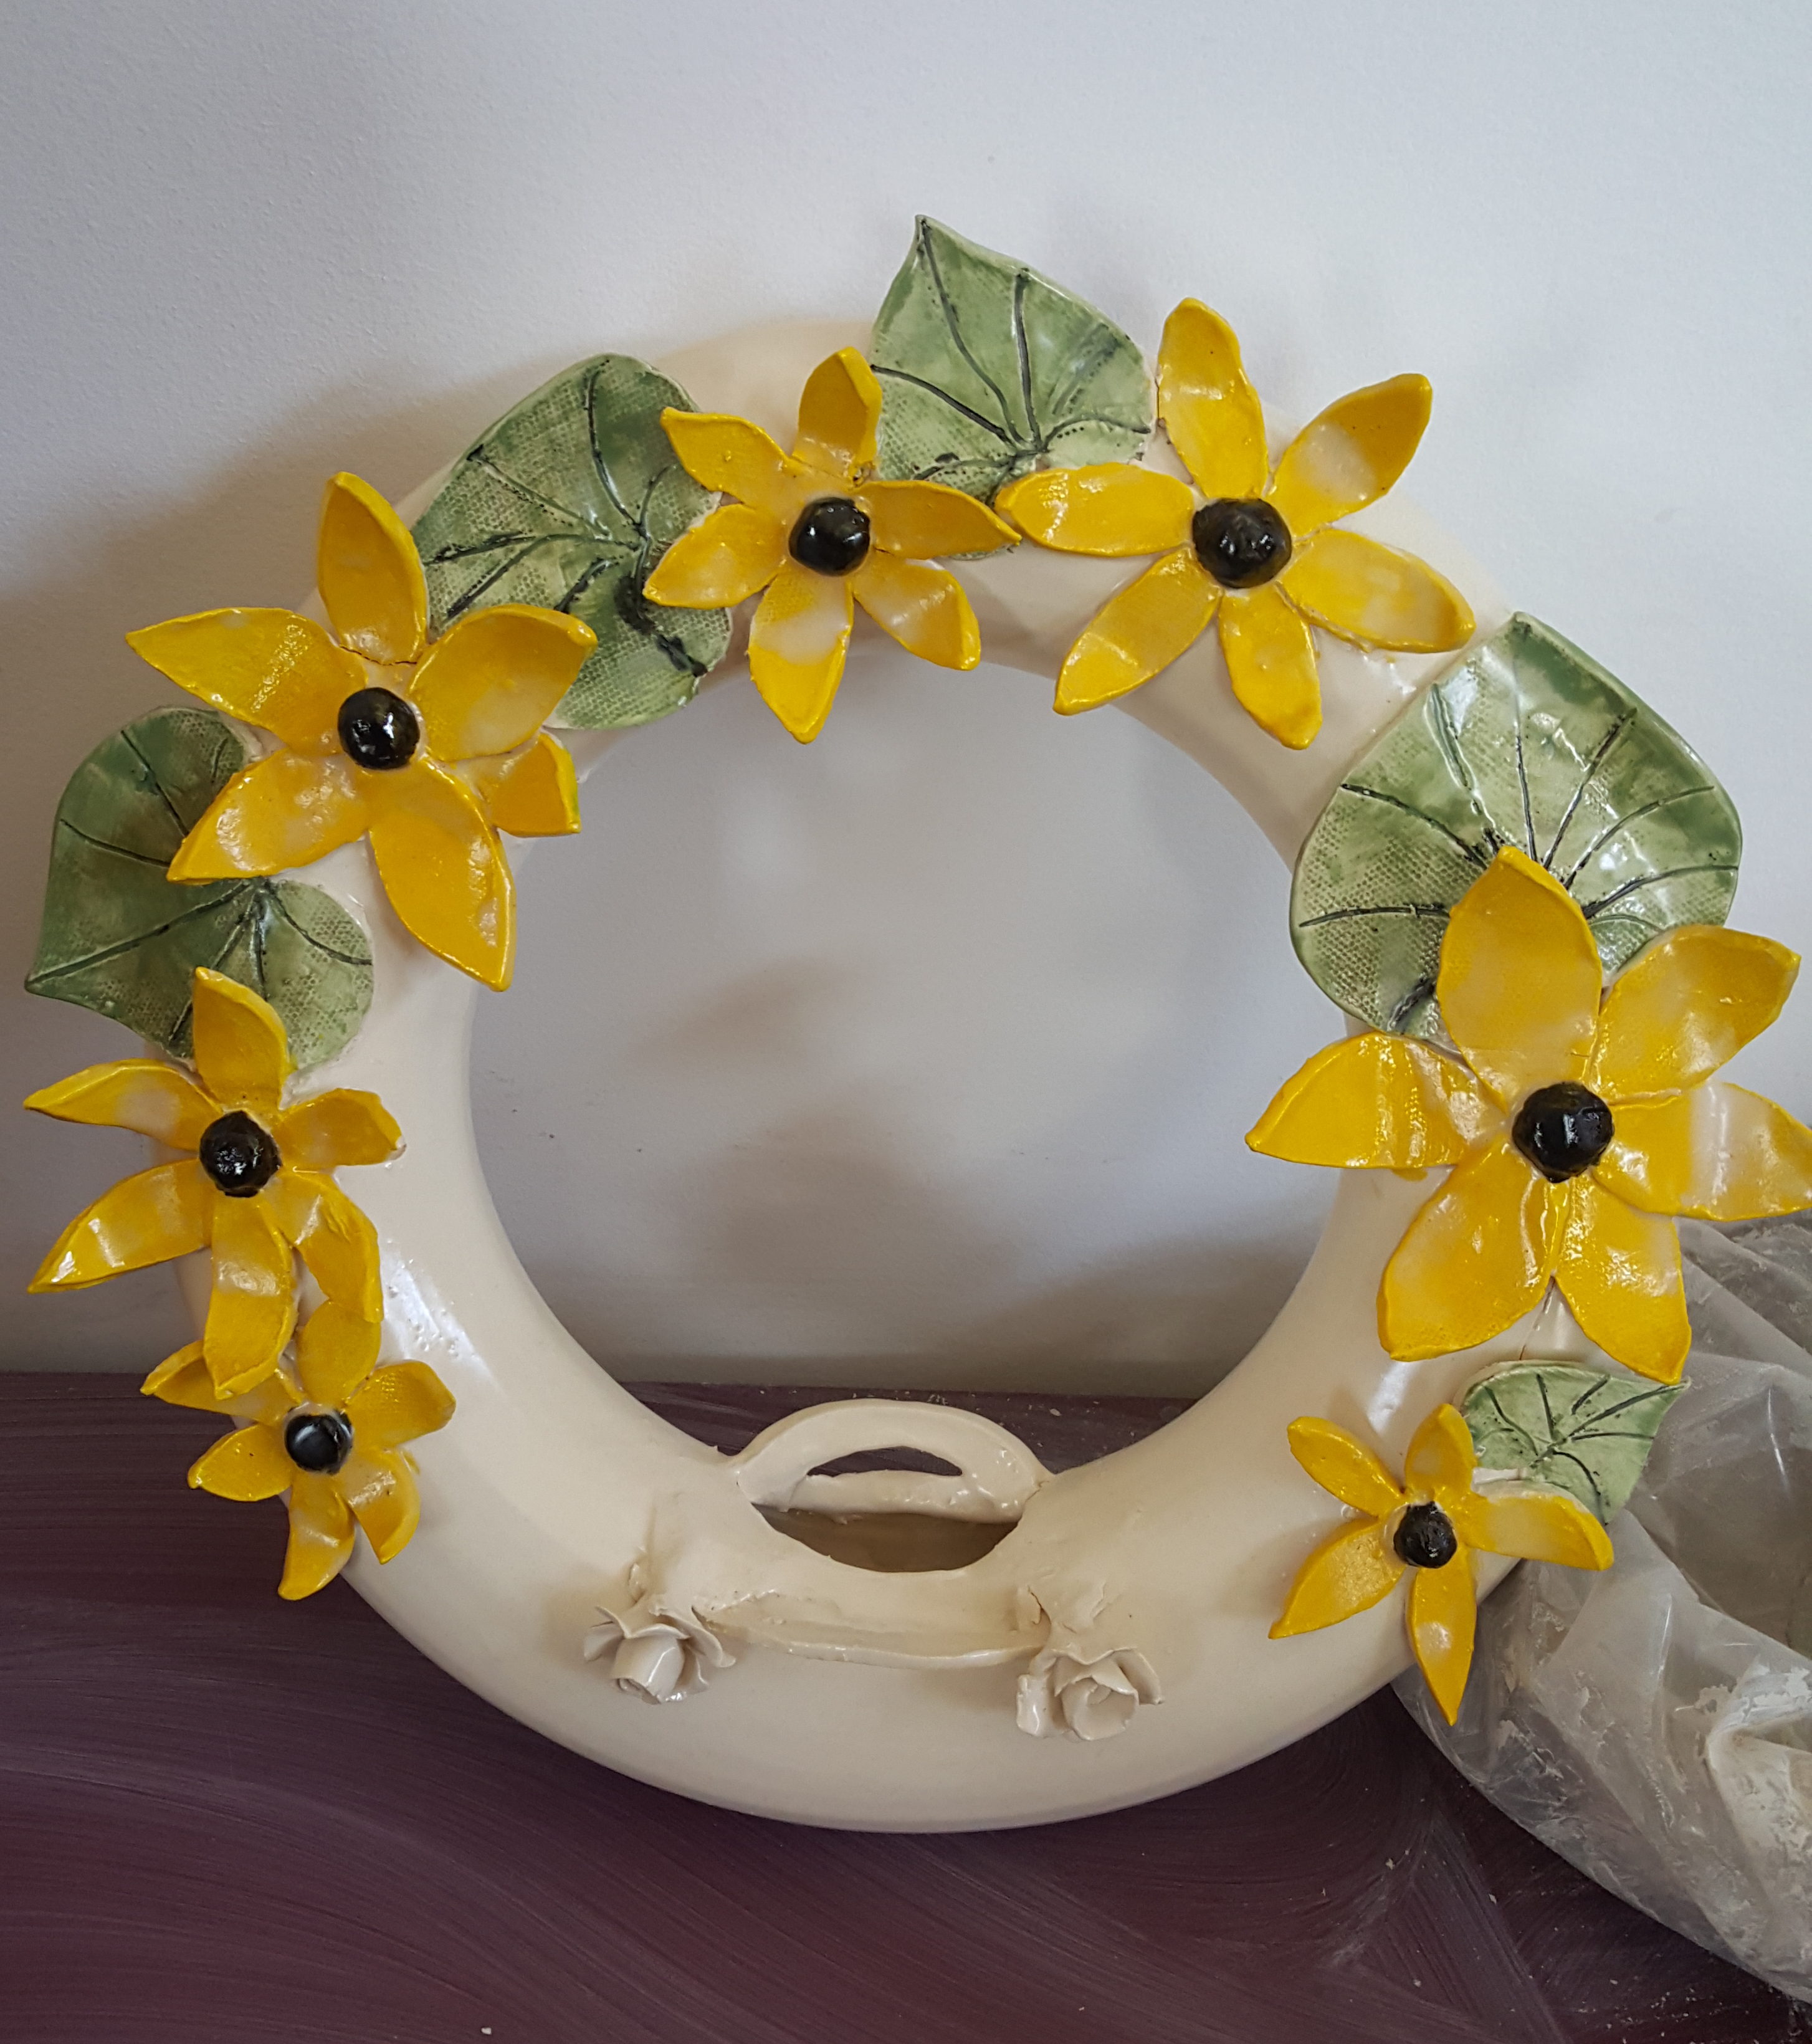
The bird feeder failed because I managed to knock some of the petals off when I was loading it into the kiln. They are fixed now with glaze, but if you look closely you can see the cracks. I like the idea of this bird feeder. It holds a surprising amount of thistle seed, and I can’t wait to see the bright yellow goldfinches sitting among the bright yellow flowers, so I will give it another shot.
If you ever wonder why handmade items cost so much, it is because lots of failures go into the final piece.
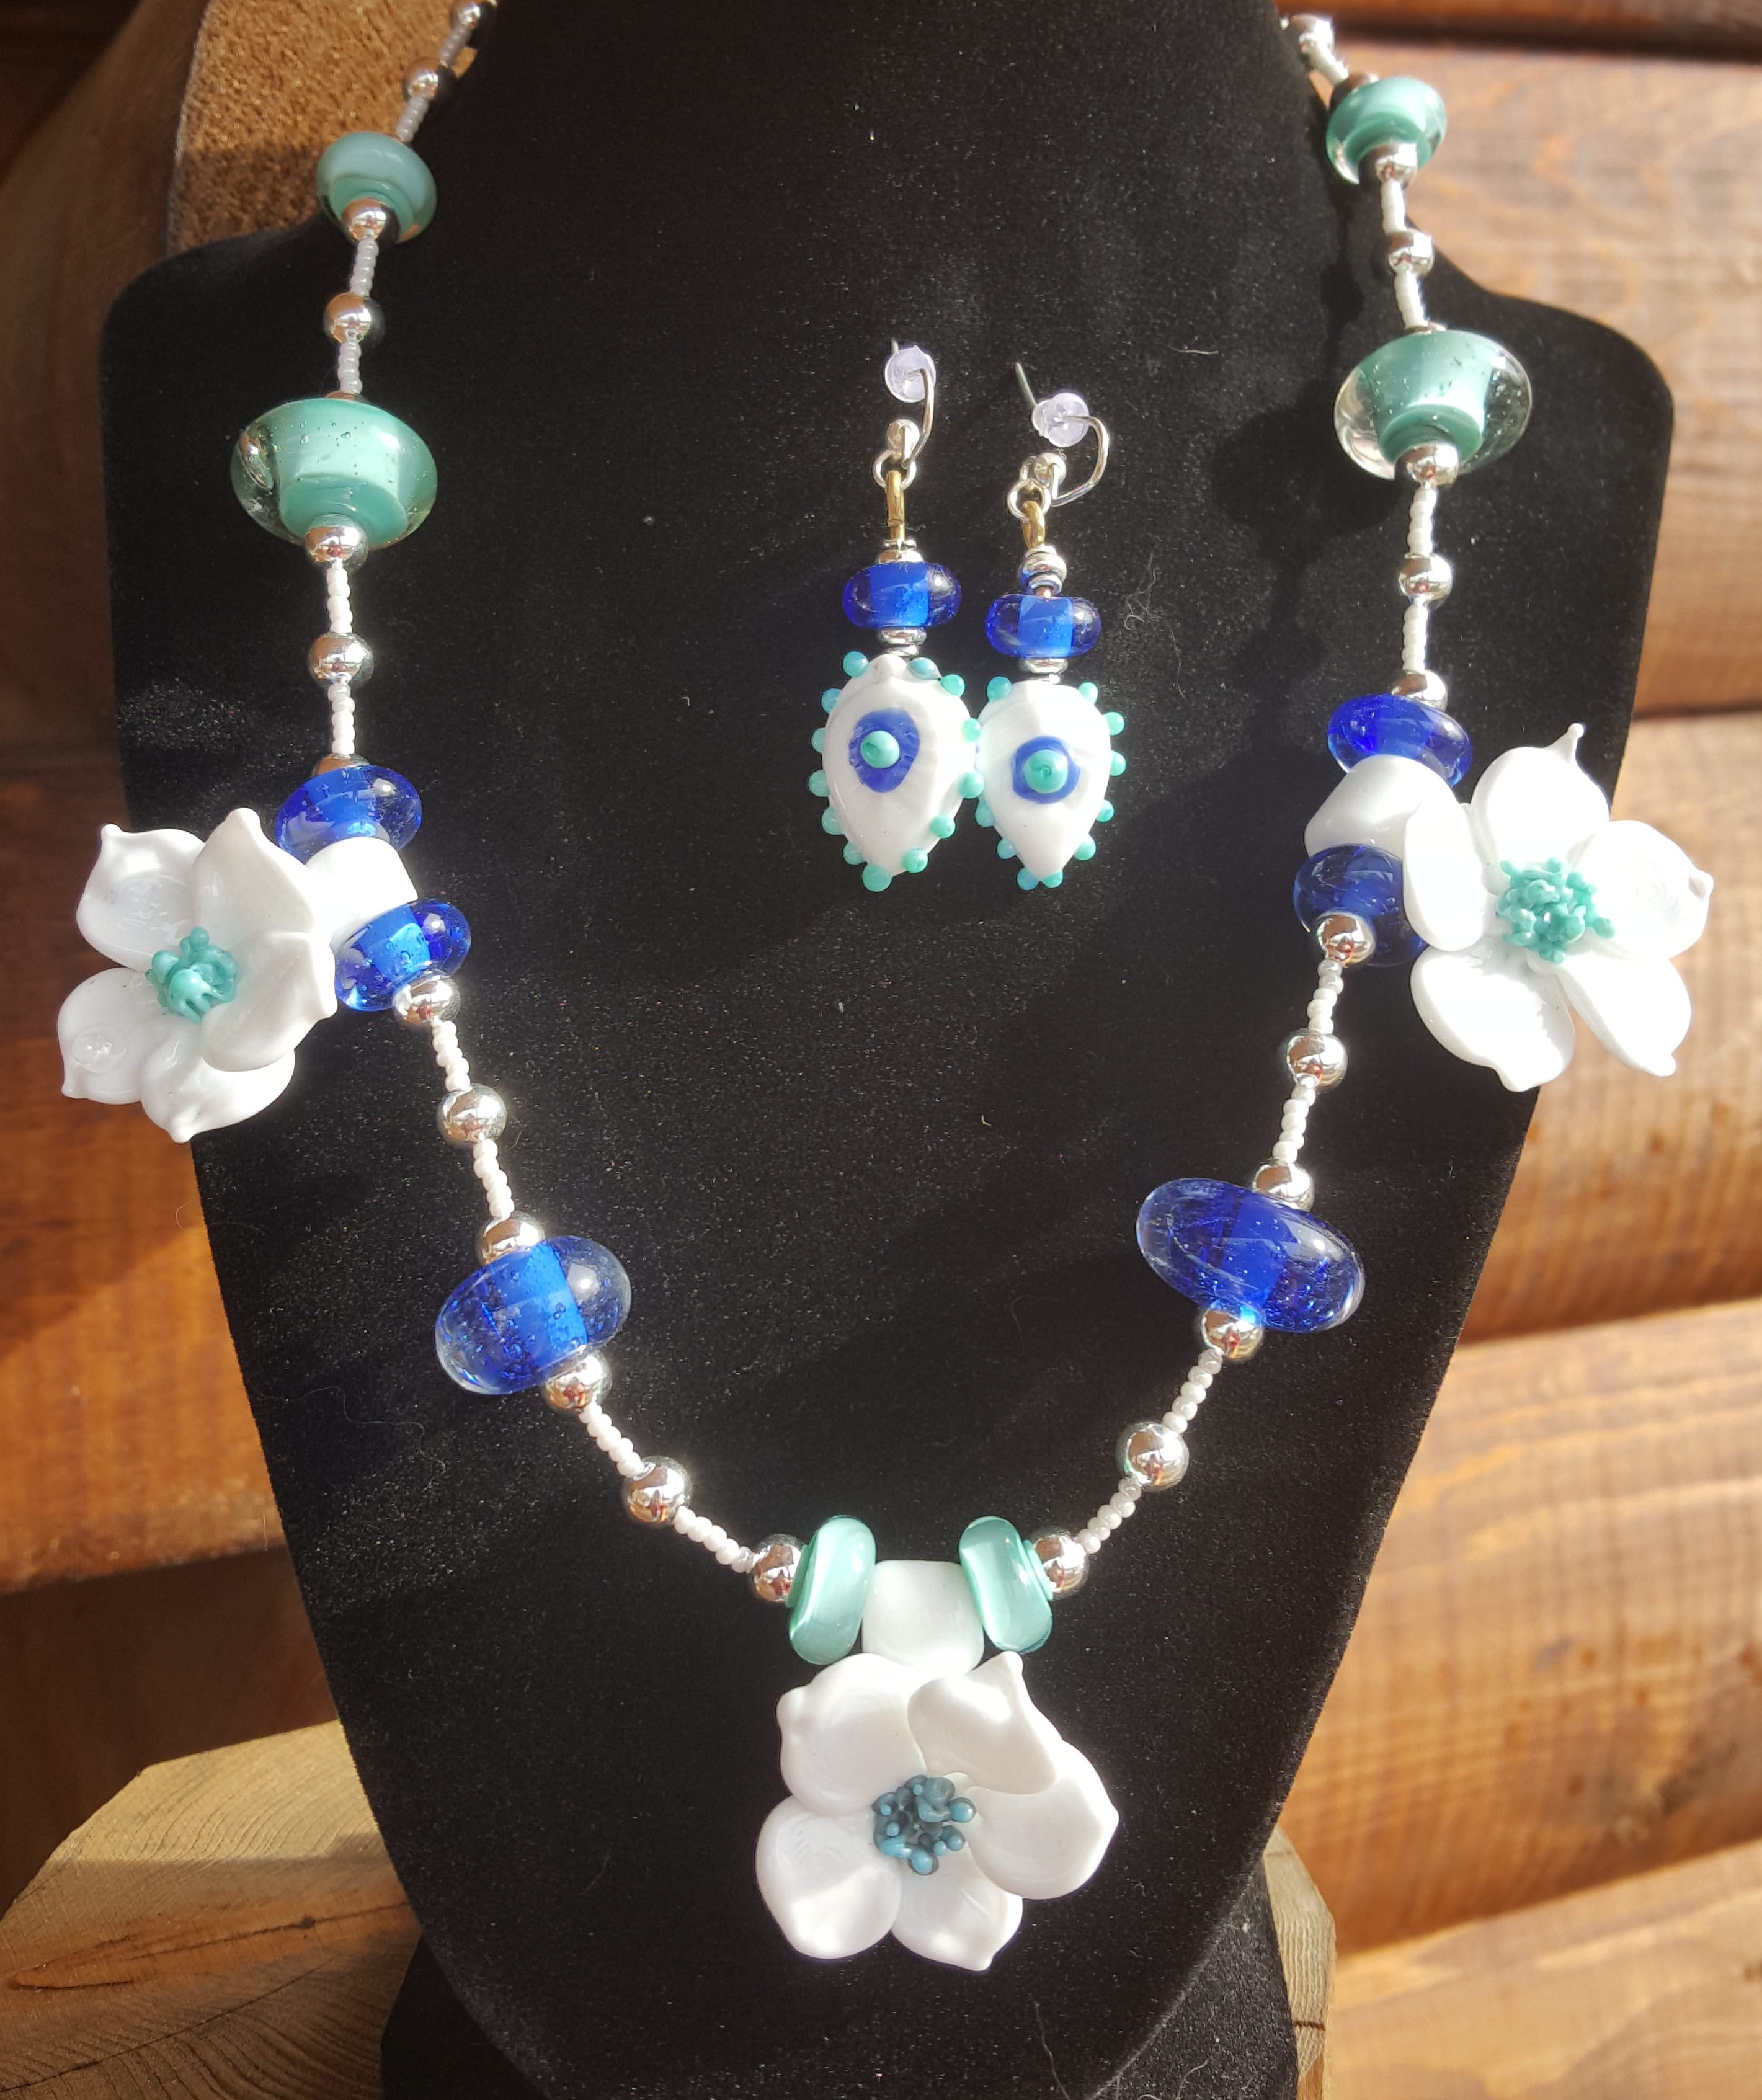
Last week, a friend contacted me, saying she was headed to a wedding in Louisiana, and asked if I would make a necklace and earrings to match her dress. Yesterday, I finished the necklace and earrings, and am happy with how they turned out. It was a challenge, I have a really hard time with color coordination, but it was fun, especially knowing that it was for a good friend.
Most children these days get a much better education than I ever did, especially in art. Children are schooled in color theory, and elements of design…the school I went to we had lots of hands on opportunity, but none of the reasons behind it, or ways to make it better. So, when it comes to color, it is hit or miss with me.
Several years ago, I went back to get my masters in education, which then landed me a substitute teaching job in a local school system. I felt like I was finally getting the fifth grade education I never had as a result of teaching. So many holes in my education that were finally explained. The art teacher in the school system was particularly good.
Nothing like learning the things you should have learned in fifth grade at the age of 50, but better late than never. I still have much to learn, but I feel like I am making progress.
Anyway, here is the picture of the dress she sent me, and the necklace and earrings I made.
Do you have a special function coming up for which I can make you a necklace?


 The other day I found myself making some piggy banks, and it got me to thinking…who ever thought of the idea of a piggy bank? Thank goodness, for the internet, with answers to questions at our finger tips.
 The piggy banks I made, started with 24 ounces of clay. From the original size, clay shrinks a lot more than you would expect – about 20% from start to finish. The original bodies of the pigs were about 8 inches long – the final bodies were about 6 inches long! After they are slowly dried for a day or two, legs, ears and eyes are added, giving them each their individual character. A slot is added on their back for money to be deposited, and a hole cut in their belly for withdrawals.


 Part of being an artist is learning through experience. Not everything works as it should. These two pieces took hours to make, but in the end, had too many defects to ever sell, so they go into my increasing inventory of rejects.